Blog Archive
-
▼
2018
(82)
-
▼
October
(29)
- Handcrafted-Wood Burnt Wall Plaque Art Pyrography-...
- All About Holiday Cards
- How to Cut your Craft in Quilting
- Passing the Love of Art Collecting to the Next Gen...
- Bone Flowers: Global Folklore of The Living Dead
- Decorate With Black And White Art
- handicraft gift idea
- Arts and Crafts Idea: Foam Sheet Glasses Case
- Abstract Art And The Spirit 1
- 3 Top Cartoon Drawing Tips For Beginners
- Wood Presents And Folk Russian Painting in Art Sho...
- Making a knitted doll
- How to Craft a Bonnet
- The Art Lover and the Art Collector
- Creative Scrapbooking
- Christmas Craft: Bead and Pipe Cleaner Ornament...
- How To Search For Collectibles On The Internet
- Celtic Tattoos
- Start an Art Collectible Hobby and Beautify Your Home
- All About Holiday Cards
- Candy Gift Baskets
- How to Make Gel Candles
- Golf Training Aids
- Do You Have Enough Hobbies To Ensure An Enjoyable ...
- Green Depression Glass
- Extra Tips On Selling Your Art
- Art Collecting: A Beginners Guide
- Funny Home Made Retirement Gifts For Laughs
- Wood ART
-
▼
October
(29)
Wednesday, October 31, 2018
Handcrafted-Wood Burnt Wall Plaque Art Pyrography- Folk Art- Flowers - Handcrafted-Wood Burnt Wall Plaque
Folk Art Handcrafted on Wood
The Handcrafted Art Pyrography-Wood Burnt Wall Plaque features a lovely picture is produced by burning every detail into a piece of birch veneer plywood. Then, the plaque is then hand-painted with watercolors to draw out all of the details of the beautiful scene and enhance the realism of the design. The picture may also be left in its natural burnt state providing a more rustic leek. An acrylic clear finish is added to bring out the natural grain of the wood and preserve the work of art for years to come.
With its wood burnt and painted or unpainted border, the Handcrafted Art Pyrography-Wood Burnt Wall Plaque is like a picture within a picture and instantly catches the eye when hung on a wall. The work of art bears the signature of the artist, L. Baber, at the bottom right corner of the image.
Measuring 12 inches by 12 inches in size, the Handcrafted Art Pyrography-Wood Burnt Wall Plaque will make a charming addition to the wall of a living room, entry way, bedroom or den. The wall plaque is also a unique alternative to paintings, posters and prints for decorating vacation homes, cabins and offices.
The Handcrafted Art Pyrography-Wood Burnt Wall Plaque is completely handmade and is a true one-of-a-kind work of art. Each one is meticulously handcrafted from start to finish by the artist, rather than churned out along assembly lines by machines. As a result, slight variations in the look and appearance of the finished design should be expected.
The wall plaque that you choose will be a real original, as no other will be produced exactly like it. Crafted in Seattle, Washington, the Handcrafted Art Pyrography-Wood Burnt Wall Plaque is American made and sure to become a favorite piece in your art collection. In addition, the wall plaque makes a unique gift idea for men and women. You can give one as a Father's Day gift, Mother's Day gift, birthday gift, Christmas gift, housewarming gift or gift for any other occasion. With its natural wood coloration, the wall plaque will look at home in any space and complements any color palette.
Take a trip to the shore without having to purchase a ticket or pack a bag! Let the Handcrafted Art Pyrography-Wood Burnt Wall Plaque take you on a journey to a beautiful picture and bring something distinctive and unique to your décor. Order this handmade wall plaque today.
Handmade pyrography wood burnt wall plaque approx. 12 inches by 12 inches
on Birch veneer/plywood ,
Handcrafted One of a Kind and custom made in Seattle Washington USA
Please keep in mind that all items are handmade one of a kind by a real human beingand not a machine. Some variations and imperfections are part of the handmade process.
I would happy to price you a custom work if you send your ideal.
Shipping 2-4 days ground USPS'
Handmade
International Customer: Please contact us for shipping cost.
This is for United States orders only. International orders send a message for shipping charges
Handcrafted One of a Kind and custom made in Seattle Washington USA
Please keep in mind that all items are handmade one of a kind by a real human being and not a machine. Some variations and imperfections are part of the handmade process.
I would happy to price you a custom work if you send your ideal.
Shipping 2-4 days ground USPS'
Blog: of art and craft-hobbies
Website Stores
http://art-and-craft-hobbies.com/
http://art-and-craft-hobbies.com/shop/
https://www.etsy.com/shop/Magikaljourneys?ref=seller-platform-mcnav
All About Holiday Cards
You may think of holiday cards as being Christmas or Seasons Greetings cards, but really there are many more holiday cards than this one holiday. There are holiday cards for Christmas, Hanukah, Easter (or Resurrection Day), Thanksgiving, Halloween, Columbus Day, President's Day, Martin Luther King Day, Independence Day, New Years, Valentine's Day, Mother's Day, Father's Day, Grandparents Day, and Administrative Assistants Day. As you can see, there are many holidays we celebrate, and each of them have their own holiday cards.
Holiday cards were not always so popular. Only in the last several years have holiday cards been created for all of the holidays we celebrate as Americans. I was surprised to find Halloween and Thanksgiving holiday cards when I went Christmas card shopping last year. I later discovered that holiday cards are becoming more and more popular, as people send holiday cards all year round to their friends and family. It is becoming increasingly popular to send holiday cards to all of you friends and family at every opportunity, just to let them know you care.
Holiday cards come in all shapes and sizes. You can choose holiday cards that are uniform and simple, and send one to everyone on your list. Or, you can choose individual holiday cards suitable for each person based on personality and what holiday they celebrate. For example, if you know people who are Christian and people who are Jewish, you may choose to send a uniform card that says simply "Season's Greetings." On the other hand, you can choose to send your Christian friends Christmas holiday cards, and your Jewish friends Hanukah holiday cards. This way everyone feels special, and knows that you are thinking of them specifically.
Holiday cards can come with fancy pictures or cartoons, sentimental poetry or funny phrases, or even music or pop up figures. You can get holiday cards specifically for each member of your family. There are holiday cards for children, parents, grandparents, aunts, uncles, nieces, nephews, husbands, wives, and friends. There are romantic holiday cards, funny holiday cards, sexy holiday cards, and sentimental holiday cards.
You can find holiday cards at any general store, retail outlet, discount store, or holiday store. You can also find holiday cards at wholesale outlets, dollar stores, and specialty shops. The funniest and most sexy holiday cards can be found at novelty stores such as Spencer's, found in most shopping malls.
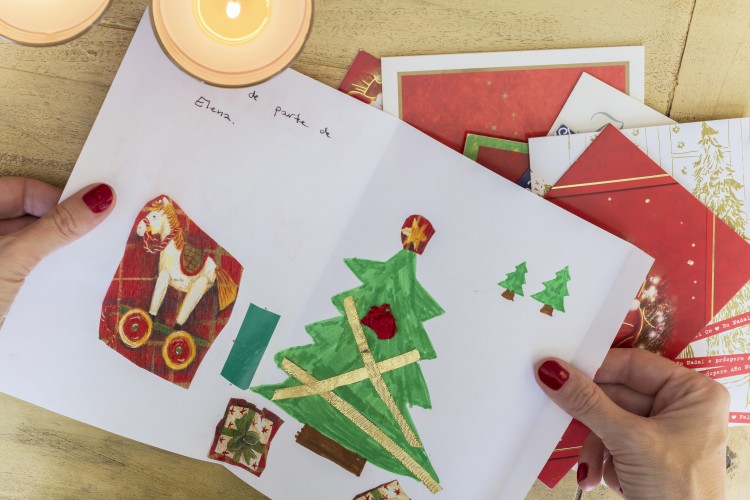
Alternatively, you can make your own holiday cards with a little bit of glue, construction paper, a pair of scissors, and a lot of creativity. Children rather enjoy making holiday cards for their friends and family. Buying a holiday card is not nearly so much fun as making one yourself. Also, the home-made holiday card from your favorite child means much more than a uniform holiday card purchased in a store.
Regardless of who you are sending a holiday card to, you are sure to find the perfect holiday card to suit that person's interests and hobbies. From Harley Davidson to Disney, holiday cards are an absolute must in every season.
Blog: of art and craft-hobbies
Website Stores
http://art-and-craft-hobbies.com/
Blog: of art and craft-hobbies
Website Stores
http://art-and-craft-hobbies.com/shop/
https://www.etsy.com/shop/Magikaljourneys?ref=seller-platform-mcnav
Monday, October 22, 2018
How to Cut your Craft in Quilting
When you start your quilt, you will need patterns, such as rectangles, squares, cut strips, and so on. Once you gather your patterns, you will need cutting tips to complete your quilt.
Cutting the strips:
When you begin to cut your strips, you will need to align your fabric, mark, etc. Use a ruler to decide the width and start cutting once you reach your desired dimensions. For instance, if you want to create a 2-inch strip, locate the mark on your ruler and place the area side by side of your edges that square.
Once you finish cut the strips. You will need a rotary cutter to complete your mission. Your layers figures are based on the strips you cut. You can also mark and then cut your strips so that you have separate squares. You perform the same actions when making rectangles. Squares are also cut in the same fashion. However, you will need to create two squares per cut.
You will need two rectangles also per cut, since the fabric is thick. For instance, if you were to cut 3 ½ inches of fabric strips x 44 inches, you will need to cut 6 ½ inches x 3 ½ x 6 ½ inches to form your rectangles.
When you start to cut your triangles, start at a 45-degree angle. Cut the squares succeeding to cut the squares slantwise, or diagonally and in half. When cutting your triangles, keep in mind that the longer sides require seams that allow room to finish. You need about a 2-inch finish line per triangle, or side. On three sides however of your triangle, you will need to leave a width of 2 ½ inches to complete your task.
If you are not use to measuring materials, purchase a transparent, heavy-duty ruler and create templates to use as your guide.
Use your templates, aligning it on the material, and lay it in line down the edges at the three sides and use your ruler in a straight line and over your template. Once you have your template in position, you can start cutting across the width to meet your template.
Once you have cut your patterns, you will need to organize and then cut your pieces. Once you cut, your pieces try to organize them so that they do not get lost. You can categorize the pieces and stack them neatly in a desired area near your sewing station.
After you organize your pieces, you want to learn how to press properly. You will need to iron your fabric to prepare it, yet you want to learn pressing techniques, rather than strict ironing. You merely press and lift, relocate, press, release, and relocate, repeating the same cycle to press your fabric.
You will need to press your fabric as you move through the stitching stage also. You will also need to press the allowances at the seams. Head in the same direction at what time you are pressing the seams. To make your fabric durable and sturdier, press the seams to one of your sides.
Learn more about pressing, and irons to complete your quilt. Pressing is important. Once you have your patterns together, pressing down, etc, you can move onto piercing a perfect quilt,
Of course, if you are not in the mood for hand piercing, you can pick up a few tips in stitching seams and allowances, as well as appliqué. Appliqué is the process of fabric pieces sewn onto fabric, sewing shaped parts of fabric onto an underpinning to form a pattern or design.
Blog: of art and craft-hobbies
Website Stores
http://art-and-craft-hobbies.com/
https://www.etsy.com/shop/Magikaljourneys?ref=seller-platform-mcnav
Saturday, October 20, 2018
Passing the Love of Art Collecting to the Next Generation
If you have been an active member of the art community and particularly if you already are an art collector, it is natural to want to pass that love of art collection on to your kids. But you may not have to infuse the young people in your home with a desire to enjoy art collecting. If it is part of your life already, they no doubt have already picked up on your enthusiasm for the hobby and have an avid interest in art collection. If so, that is a great place to start.
The next step is to start them on a step-by-step path to becoming art collectors themselves. As you move them from stage to stage, their enthusiasm and the fun they are having learning this wonderful pastime will truly be a family affair.
· Let them know you are taking a journey with them. By sitting down with each child when they are at the right age and letting them know you are starting them on a road to becoming art collectors, their excitement will be overwhelming. They will throw themselves into the activity with a passion that will remind you of your own youth.
· Teach them to refine their powers of observation. Art collection is impossible without well developed art appreciation. So accelerate their art education both in terms of formal education and through many outings and “art safaris” for them to learn to look at fine art.
· Engage the children in art history. The great thing about becoming a collector is you get in touch with the artists, their backgrounds and motivations when they painted the fine art you are buying. By giving your children a firm understanding of the history behind their favorite art works, they can enjoy the deeper understanding that comes from such education and become eager learners of art history as well.
· Help them find their passion. Each of us has our passion in our enjoyment of fine art. While one may eat and breathe impressionist paintings, another may be obsessed with modern sculpture. You cannot just “give” your children a passion for the genre and style of art they come to enjoy. But by exposing them to a wide variety of fine art, they will discover it themselves.
· Start out with a small budget. Imagine the excitement your children will experience when they purchase their first piece for their art collection. Just as you had to grow in your ability to be an active art collector perhaps because of budget constraints, keeping their budget reasonable is part of the training. Because they have a limited budget, they will be much more careful about the pieces they purchase. You can expand that budget and their ability to grow as junior art collectors as their enjoyment and understanding of the hobby expands.
· Make it a family project to set initial art collection goals. Weekly family meetings that are just about art collecting will become a favorite time for the children. There you can help them establish their initial goals for their own collections based on their interests and their knowledge of the genre, artists and art history.
· Help them build their collections carefully and slowly. Art collection is a passion that is made sweeter through patience and slow expansion of their collections. By enjoying the delayed gratification of the growth of their collections, they will learn valuable lessons about life as well.
Your children will relish this training because you will be teaching them what they see in you, a love of fine art. And when they are adults, they will look back with nostalgia and joy at those times when mom and dad took time with them to teach them the fine art of art collecting.
Blog: of art and craft-hobbies
Website Stores
http://art-and-craft-hobbies.com/shop/
https://www.etsy.com/shop/Magikaljourneys?ref=seller-platform-mcnav
Friday, October 19, 2018
Bone Flowers: Global Folklore of The Living Dead
Title:
Bone Flowers: Global Folklore of The Living Dead
Summary:
Death is a universal concept, although how it is treated and looked upon varies from culture to culture, from religion to religion. While beings that come back from the dead are common themes in the mythologies and folklore of various peoples, there are often cultural differences that bely even the most prevalent “themes” among them. Some have theorized that these tales are common because of the equally common separation anxiety people feel towards the dying and dead.
Keywords:
mental health, separation anxiety, anxiety, fear and anxiety
Article Body:
Death is as common a theme in the world of the arts as it is an event in everyday life. The point where a single, living being is separated from other living souls has become as common a subject of literature and art as any other aspect of human life. It has also inspired in countless cultures various concepts on what happens beyond the mortal coil. This is understandable, as the dying tend to feel anxiety at the idea of death. The bereaved, for their part, go through a period of grief and separation anxiety. Arguably, this aspect of human psychology regarding death can be used as an explanation for the widespread – nearly universal, by some accounts – tales of the “undead.”
Achieving or stumbling upon tales of life after death appears in almost every major continent. Ghosts are prominent players in these tales, naturally. These incorporeal beings generally are attributed to have a form of separation anxiety, fundamentally attached to something they valued or held dear in life. The unwillingness to leave also grants them the ability to manifest in the mortal world on a variety of levels. While Western concepts of ghosts are incapable of influencing the mortal world on a physical level, they are more than able to damage the mental health of the living. In contrast, Chinese ghosts come in a variety of forms, but all invariably are capable of visiting physical harm upon the living.
It is not only the spirit that is subject to being turned into one of the “undead,” as the living tend to attach emotions to the body as well. Zombies are corpses brought back from the dead through arcane and occult rituals, are a prime example of this. The drauger of Norse mythology also fits into this category, as they are corpses that resist being brought to the burial mound or refuse to stay buried. Some analysts of the literature and mythology surrounding these beings have noticed that most people regard these creatures with fear and anxiety. There are some that theorize that this stems more from cultural and religious norms about death than society at large. Most people have come to believe that a the bodies of the departed should be incapable of motion, so an animated corpse is something to be feared.
However, this apparent idea does not extend to forms of “un-death” that are both spirit and flesh, such as the Romanian strugoi – more commonly referred to as vampires. These creatures are often seen as having both the body and the soul of the deceased, but require something else to continue corporeal existence. This is apparently a prevalent phenomenon among various cultures, though the substance varies from culture to culture. Europeans consider the blood as the sustaining factor in the existence of vampires, while most African equivalents of the creatures subsist on human feces or bones. Regardless, these creatures are traditionally regarded with fear and anxiety by mortals, particularly the ones that are being used as “food.” While the vampire image popularized by Hollywood's version of Dracula has become a creature of wonder and sensuality, most other variants are still objects of horror.
One interesting tangent to the “vampire” category above would be the variations to be found in Chinese and Japanese culture. The jiang shi (hopping corpses) of China, for example, are comparable to their Western counterparts, except that it is not the blood in and of itself that feeds them. Rather, the jiang shi are said to lack something called chi – the essence of life – and require taking it from the living to stay extant. Most often, the strength of human chi is concentrated in the blood. The end result is that the victim is drained of all blood, as consequence of the feeding. The gaki of Japan are similar creatures, but are often described as being more human in countenance than the jiang shi. Also, they take the chi directly, leaving a body that appears to have died while asleep.
Regardless of what form or variation is taken, the state of “undeath” is a prevalent one in the various cultures of the world. The fear and anxiety associated with death often attaches itself to these mythical creatures, even if pop culture has made some forms more appealing than others. In some ways, the undead are considered a means of coping with the separation anxiety people experience around dying people. At the same time, they also act as allegories for what could happen if certain cultural and religious norms are ignored in life.
Blog: of art and craft-hobbies
Website Stores
http://art-and-craft-hobbies.com/
http://art-and-craft-hobbies.com/shop/
https://www.etsy.com/shop/Magikaljourneys?ref=seller-platform-mcnav
Thursday, October 18, 2018
Decorate With Black And White Art
Summary:
As an interior designer, it is only natural that I love to give people counsel as they attempt to make decorating decisions for their homes and offices. I love nothing more than to spend an afternoon over tea discussing color options, themes and good fabrics for my friends. I recently met with a client and together we came up with the idea for her to decorate her home office entirely with black and white art.
I must tell you that usually I am not a huge fan of black and wh...
Keywords:
black and white art
Article Body:
As an interior designer, it is only natural that I love to give people counsel as they attempt to make decorating decisions for their homes and offices. I love nothing more than to spend an afternoon over tea discussing color options, themes and good fabrics for my friends. I recently met with a client and together we came up with the idea for her to decorate her home office entirely with black and white art.
I must tell you that usually I am not a huge fan of black and white art. In fact, I have never suggested that a client decorate with it until this particular meeting. Sometimes I find that black and white art is quite boring. As I met with this client, however, and we talked about her tastes and her decorating hopes for her home office, we both determined that black and white art was the best choice for her.
I've now been on the hunt for great pieces of black and white art. I share this to encourage anyone who is looking for great black and white art that there are great uses for it and that there are places to find it. One of my favorite sources of black and white art has become antique stores. I have found the most lovely pieces of black and white art at various antique stores lately.
Just knowing that you want to decorate with black and white art may not be enough. Realize that you must have a good idea of the specific kind of art that you are hoping to find. I have discovered that there are many varieties of black and white art to choose from. Some pieces are vintage looking, and there is definitely a wide variety of modern pieces of black and white art to choose from.
Get online and do a search for black and white art. You might be surprised how much comes up. This is my favorite way to encourage clients to begin the process of narrowing down their style and preferences. You can often get a pretty good idea of the things you like when you see them first. So take your time and look at as many samples of black and white art as you can. The better idea you have of what you want, the better chance you will have of finding it.
I love nothing more than to help people decorate their homes and offices with style and creativity. The world of black and white art was recently opened up to me and I have fallen in love with its possibilities.
Blog: of art and craft-hobbies
Website Stores
http://art-and-craft-hobbies.com/
http://art-and-craft-hobbies.com/shop/
https://www.etsy.com/shop/Magikaljourneys?ref=seller-platform-mcnav
handicraft gift idea
If you are looking for a handicraft gift idea to make for someone special, perhaps that person would like an apron. When we think of aprons, we often think of mothers and grandmothers in the kitchen, but men can often benefit from having an apron as well. They often enjoy barbecuing, for one thing. They also can use an apron in the workshop. Children, too, can use an apron for many of their activities, such as arts and crafts. Here are simple instructions for making a handicraft gift of an apron that can be adapted for anyone.
Start with a piece of sturdy fabric suitable for the individual for whom you are making the handicraft gift. The fabric needs to be wide enough to wrap 1/2 to 3/4 of the way around them and long enough to cover them from collar bone to just above the knee. For a large adult, 25 to 30 inches wide by 36 to 40 inches long should be about right. A slimmer adult can use a narrower apron, but if they will be wiping their hands on the sides of it, they might appreciate the extra width. An apron for a child of 10 could start with a piece of fabric about 18 inches wide by 25-30 inches long.
The best types of fabric to use are sturdy cottons, such as medium weight denim or twill. Soft cottons such as broadcloth or muslin are all right in the kitchen, but will not last long, and would not hold up in the garden or workshop at all. Other materials you'll need are thread and a sewing machine. You will also need enough extra fabric to make a strap to go around the neck, ties for the back, and pockets.
When designing the handicraft gift, you can be as creative as you like with pockets. Every apron is more useful with pockets. A person who cleans houses, for instance, can use pockets for odds and ends they pick up as well as for their spray bottles, sponges, and scrub brushes.
To make the apron, fold the piece of fabric lengthwise. This will allow you to cut the shape with one cut, making the two sides symmetrical. What you will be shaping when you make the cut will be the bib section of the apron. The bib for an adult sized apron will need to be about 9 inches wide. Measure from the fold about 5-1/2 inches. This is half the width of the bib plus an inch to fold under twice to form a hem. The piece you will cut off the side to shape the bib will be a half bullet shape with the tip of the bullet being where the ties will be attached. The length of the half bullet shape should be about a foot, and the width will be from the spot you marked 5-1/2 inches from the fold to the outside edge of the fabric. When these pieces are cut off, the result should be an apron shaped piece of fabric.
Now decorate the apron with pockets and any other decorations you desire. After this it is time to fold under the edges all around and stitch down with sturdy stitching for a nice hem all around the handicraft gift. Cut two pieces of fabric a yard long by two inches wide. Fold lengthwise and fold raw edges to the inside. Press and stitch down along the length to make the ties. Attach the ties at the waist of the apron handicraft gift. (If these ties seem a little long, it is because a lot of people like to bring the ties to the front and tie them there.) Cut another piece of fabric 18 to 20 inches long by 5 inches wide fold in half lengthwise and press. Press again with the raw edges of the long side tucked under 1/2 inch. Stitch down the open side. Attach this piece to the sides of the top of the bib, sewing it to the back of the bib and topstitching on the front side of the bib. Be careful not to twist it when you attach it.
People who work hard at homemaking, barbecuing and in the workshop will appreciate a handicraft gift of a sturdy apron. Mostly they will appreciate the effort and design you have put into making a handicraft gift that they can use.
Blog: of art and craft-hobbies
Website Stores
http://art-and-craft-hobbies.com/
http://art-and-craft-hobbies.com/shop/
https://www.etsy.com/shop/Magikaljourneys?ref=seller-platform-mcnav
Arts and Crafts Idea: Foam Sheet Glasses Case
Are you a camp director, teacher, or homeschool mom looking for a new arts and crafts idea for your kids? Or maybe you are a recreation director at a senior center or nursing home and could use a new project. Either way, this arts and crafts idea will be interesting and fun for all. This glass case can be used, given as a gift, or converted into a necklace purse.
To make the glasses case, you will need the following simple materials: a square of craft foam, plastic or large blunt needles, lanyard lace or thick yarn. Cut two rectangles from the foam, each 3-1/2 inches (9 cm.) by 6 inches (15 cm.). With a hole punch, make holes on three sides of each rectangle, leaving one short side unpunched. Make the holes 1/2 inch apart and allow at least 1/4 inch between the hole and the edge of the craft foam. The holes need to line up so that the two pieces can be laced together. If you are preparing the craft for small children, you should make the holes yourself. Otherwise, the crafters can do this step if you have enough pairs of hole punches.
At this point the crafters can cut decorative shapes from other colors of craft foam, or you can buy sets of ready-cut foam shapes. If you are doing the craft at a special event, like vacation Bible school, choose shapes that echo the theme of the event. For instance, if the Bible school or camp has a cowboy theme, find shapes that fit well, such as boots, cowboy hats, and stars. Let the kids choose the shapes they like and glue on as desired. You might also like to provide beads or sequins to glue on as well, especially if the crafters are a little older.
The next step in this arts and crafts idea is to thread the plastic needle with the yarn or lanyard lace. Yarn might be a little easier to handle, but lanyard lace is shiny and attractive. In a pinch, some teachers of small children use a bobby pin as a needle. It is certainly a safe alternative. Simply loop the yarn through the opening and use the open end of the bobby pin as if it were the point of the needle. The children can now begin to lace the front and back of the glasses case together.
To turn this arts and crafts idea into a necklace purse, simply attach a piece of lanyard lace to each corner making a long handle. Kids will enjoy using this case as a place to store secret notes and small objects. If they'd rather, they can give the glasses case to a parent, grandparent, or friend who wears glasses. Either way, this arts and crafts idea will be interesting for all.
Blog: of art and craft-hobbies
Website Stores
http://art-and-craft-hobbies.com/
http://art-and-craft-hobbies.com/shop/
https://www.etsy.com/shop/Magikaljourneys?ref=seller-platform-mcnav
Abstract Art And The Spirit 1
Title:
Abstract Art And The Spirit 1
Summary:
It has been a long and raging arguement that the abstract expressionists of the 50’s, 60’s and 70’s were very busy contemplating their own navels and trying to find the “zen” in everything they did.
I would argue that they were in fact just one very important example of the hungry sleep-drugged soul seeking a way to be heard. However, many artsists of those times, and indeed today, would flatly deny anything remotely to do with spiritual things – or worse still – religiou…
Keywords:
abstract,art,spirit,soul,painting
Article Body:
It has been a long and raging arguement that the abstract expressionists of the 50’s, 60’s and 70’s were very busy contemplating their own navels and trying to find the “zen” in everything they did.
Keywords:
abstract,art,spirit,soul,painting
Article Body:
It has been a long and raging arguement that the abstract expressionists of the 50’s, 60’s and 70’s were very busy contemplating their own navels and trying to find the “zen” in everything they did.
I would argue that they were in fact just one very important example of the hungry sleep-drugged soul seeking a way to be heard. However, many artsists of those times, and indeed today, would flatly deny anything remotely to do with spiritual things – or worse still – religious things.
Take, for instance, one of my favourites – Mark Rothko. This tragic artist committed himself to the task of producing massive canvases with many vaguely resembling the outline of a window – especially an after image once the eye has closed. His vast expanses of colour seemed to hunt out a corner or edge in a desperate attempt to complete, or conclude, the picture. Not satisfied with that he went on to give up titling his work saying that he did not want to influence the onlooker in any way. Ironically he failed … and sadly took his own life. For me his works speak of wonderful tantilizing clues visually demonstrating the struggling spirit seeking (and succeeding!) in revealing herself – now that is real influence! Let me explain by an apparently unrelated route:
I seek to assist my own spirit in attempting to make manifest even the tiniest, most pathetic, weakest fact that the spirit in us all is not only just trying to communicate with us – but is in fact actively seeking to set the whole human balance right … which is the spirit leading the mind and body back to her source – not the other way round – the mind and body leading the blinded soul to … well, eventually death.
Not so long ago I came across the writings of Meister Eckhart, a fourteenth century Christian mystic. His words amazed me. He described in his many sermons what he believed to be the truth as to why we are here. He also revealed many tantilizing “images” of the spirit from the least angelic being right up to God Himself. His descriptions were … how can I put it simply? … abstract!
In one of his sermons he described God as … “unknowable” … “not able to be understood” … “undefinable”. In another he made a statement (one of many which may have contributed to him being accused of heresy!) “People say God exists … God does not exist … ” left out of context that would be a truly blasphemous assertion. But he went on to say that “… God is far greater … God is beyond existance”. These and many other controversial sayings have impressed me so much that I have come to “see” God as an abstract entity – not, I hasten to add, an anarchic abstract form – but rather a God far more powerful, far more greater – than I can imagine … in other words totally undefinable. Rather than this putting a distance between me and God, it has done exactly the opposite. And when Eckhart began to describe the life of Christ in an almost completely abstract way – Eckhart said that Christs life was the greatest example of the seeking and finding the uncreated source of the pure soul – my imagination began to run like a film of frenzied obscure visuals. Eckhart has become, to me, the patron saint of abstract artists.
The beauty of Eckharts enigmatic words are intensely inspiring. What better way to illustrate his poetic writings than to describe Gods “isness” in the very basic form of a gigantic flat area of one saturated colour untainted by anythingelse. Strangely enough this could be part of an exact description from one of Rothko’s immense, sometimes almost monochromatic, paintings.
But this is by no means the whole story … one of Eckhart’s contradictions said that on the one hand God is totally unapproachable, yet at the same time God is actually very, very approachable …
Blog: of art and craft-hobbies
Website Stores
https://www.etsy.com/shop/Magikaljourneys?ref=seller-platform-mcnav
Wednesday, October 17, 2018
3 Top Cartoon Drawing Tips For Beginners
Summary:
Cartooning is not about drawing it is about telling stories. Yes, even when you are drawing a single illustration you are telling a story. Cartooning is about expressing your thoughts. And it is your thoughts expressed beautifully through your cartoon characters that make you different from other average cartoon makers.
But as in every other field of life here also you must learn to walk first before you try running. To express your thoughts and ideas through your cartoon ...
Keywords:
cartoon drawing, kids, how to draw, learning to draw, cartoons
Article Body:
Cartooning is not about drawing it is about telling stories. Yes, even when you are drawing a single illustration you are telling a story. Cartooning is about expressing your thoughts. And it is your thoughts expressed beautifully through your cartoon characters that make you different from other average cartoon makers.
But as in every other field of life here also you must learn to walk first before you try running. To express your thoughts and ideas through your cartoon characters, you need to master the skill of cartoon drawing first. Then of course you can use your cartoon drawing skills to tell story to your liking.
To be skilled in cartoon drawing you have to face a learning curve. You just can’t decide to be a cartoonist then copy some popular cartoon figures and become an accomplished cartoonist who is rich and famous. If you are lucky and talented with keen sense of observation you may pickup one or two tricks by making copy of popular cartoon figures. But that is too inadequate to be of any use.
There are various ways that you can take to learn cartoon drawing --you can join cartooning school or take a home study course or follow a book of an expert cartoonist -- the bottom line is you have to follow the steps. Like you should first teach yourself drawing 3d shapes, then learn to stretch, squash those 3d shapes in your drawing. Next you need to practice things like drawing hands and head before moving on to motion and emotion and advanced things like that.
If it sounds like lot of work, you are right. But what you achieve at the end is worth working for. If you are smart however you can use the tips you are going to discover here to make the whole learning process fast and painless.
1. ==> Do not start with computers. I agree I run the risk of sounding backdated. But here I am not opposing usage of computer altogether, no sane person can do that. But for beginners there is no alternative to using paper and pencil.
There are various software that help you so much that you can go ahead even without learning how to draw a smooth line. This kind of over dependency on computers from the very beginning always backfires down the road.
2. ==> Nail the fact in your mind that construction of human, animal, cars and most of the things that that we see around us are complex 3d structures though we draw them on paper which is 2D. So when drawing you must mentally analyze your model in terms of 3d shapes like spheres and boxes and not in terms of 2d shapes like circles and rectangles.
Also when you draw something from paper (i.e. 2D), look for and find out the 3d shapes that make up the character.
3. ==> Most of the cartoon drawing or figure drawing tutorials always start with some basic 3d shapes and after a number of steps end up in a complete and beautiful figure. This technique is very effective in learning how we can draw complex figures starting with simple shapes. But what I am going to tell you will make your pace of learning even faster. It is in fact very simple way of using the same tutorial. Just a lot more effective.
What you need to do is start where the tutorial ends and go backward from there. See the completed figure and try to recognize the ingredient basic shapes. And compare your analysis with the exact shapes that are used in the tutorial.
This will give you a very through exercise in recognizing the basic shapes. And after some time you will be analyzing the real life around you like an expert. Just take your time and practice this technique, and see how fast it will improve your skill in cartoon drawing.
Cartoon drawing is pure fun both for professionals who earn their living through cartooning and hobbyists who draw cartoon only for personal pleasure. I do not know what you goal is but hope the tips here will be helpful for you. Never stop learning: there are a whole lot to learn and even more fun to have in the process. Happy journey!
Blog: of art and craft-hobbies
Website Stores
Wood Presents And Folk Russian Painting in Art Shop Online
Summary:
Khokhloma art painting is a bright distinctive phenomenon of Russian decorative applied art. This traditional art wood craft first appeared in XVII century in the Nizhny Novgorod province and got its name from a big trading village Khokhloma, where these all wooden art works were originated.
Keywords:
art shop,art store,art gift,art present,wood present,wood gift,gift of art,gift shop,present shop,gift store,present store,wood store,wood shop,wood art,art work,artwork,art painting,present ideas,gift ideas,wood souvenir,tableware,khokhloma,palekh,wood vase
Article Body:
Originally Khokhloma <b>wood tableware</b> were produced in monasteries and for the czar court only. At that time Khokhloma tableware production was not large scale. It was because of expensive imported tin. In 1720s after the end of the North War tin flow to Russian increased. The price went down and the material came within reach of many masters. The production and the sales of brightly painted hand made <b>art works</b> expanded.
Thus in the XIX century items with khokhloma painting were famous not only in Russia but in Persia, India, Middle East, the USA and Australia as well. The export of khokhloma items grew after the worldwide exhibition in 1889 in Paris.
In 1916 Nizhegorodskoye Zemstvo established the first School for Wood-Working Arts and Crafts in Semyonov. The folk arts and folklore flourished in Volga region near Nizhny Novgorod province. No other territory in Russia could equal it in the number and originality of the folk arts and crafts that had sprang to life and were developed in the local communities. The Khokhloma <b>art painting on wooden tableware</b> is the type of Nizhny Novgorod <b>folk art craft</b> that became most popular in Russia and foreign countries.
The “grass-leaves” decorative ornaments and their peculiar color scheme suggest that the Khokhloma art is rooted in the ancient Russian decorative culture while the imitation of gilt ornaments on wood dates back to the medieval Russian handicraft skills. The painting technique has been somewhat upgraded but remains essentially the same as in the ancient time.
<b>Khokhloma russian painting</b> amazes you with its delicate grass pattern and festive coloring, which is based on combination of scarlet cinnabar and flittering gold against the black lacquer background. This is Khokhloma specific feature. Masters used tin powder and lacquer to obtain such gold color. Now they use aluminum powder.
First, the <b>art tableware</b> are shaped on a lathe from the dried lime wood, which are turned into bowls, vases, mugs, dishes and spoons.
They are dried and covered with red and brown primer, so that they start looking like earthen. The unpainted articles are now coated with drying oil. Next they are polished with powdered aluminium. They become dull shining, like silver, and go to the painting division. Painted articles are then varnished and hardened in ovens at the temperature of 120-130 degrees. The heat turns the varnish yellow, the “silver” into “gold” and mellows the vivid design with an even, golden tone.
The Khokhloma dishes, cups and wooden drink pots were used for serving food at holiday feasts. The wooden tableware using at the Moscow house of an important statesman had to look valuable; accordingly, they were modeled on the rich painted plates decorated with real golden fabricated by the jewelers for the luxurious homes of the Russian nobility. Thanks to the special varnish and high-temperature processing they are quite practical and safe in use. <b>You can drink and eat using these Khokhloma tableware</b>, because such wares not sensitive to cold and hot, salty and sour food.
Apart from Khokhloma <b>wood presents</b> of tableware most visitors to Russia will have at least one set of Matrioshka dolls in their luggage. These dolls within dolls have long been a source of fascination. The undoing of the main doll to reveal others almost ad-in-finitem has always produced wonderment and appreciation for the woodcrafts art.
Examples of beautiful <b>Khokhloma wood art presents</b>, Paleh and Mstera <b>varnished miniatures</b> you can look at <b>art store</b> online site. It is amazing that what started out as a true folk tradition over 300 years ago is still thriving and remains basically true to it’s roots, albeit on a more organized scale.
Blog: of art and craft-hobbies
Website Stores
Making a knitted doll
Summary:
Spending your free time in activities such as craft making can boost up your creative skills and also help you to make some good stuff for your home and family.
Keywords:
craft book, craft book club, arts and crafts book, kid book crafts, discount craft book, child craft book, used book craft
Article Body:
Many times, you have some free time to spend and you are confused as what to do then? There are many great ideas to utilize that time efficiently and creatively. One of them is making or designing some craft work. Craft is the art or skill of doing something in an artistic way. There are lots of craft ideas such as candle making, scrap booking, fabric painting, painting projects, knitting etc. Among these, knitting is the most favorite craft work for women and many of them love to knit soft toys such as dolls.
<b> Requirements for making a knitted doll </b>
The knitted doll is very soft and simple to make. You can make it with any soft yarn kept for baby clothing that will really make it a gift for your kid. For making this, you need to have scissors, darning needles, ruler, knitting needles of size 8, cream colored ball of yarn or nay other color of your preference, a piece of 5/16 blue sheer ribbon, 5/16 blue elastic.
<b> Steps to make a knitted doll </b>
<b> 1. </b> You need to cast on 34 stitches with the help of soft colored yarn but remember to leave a 5 inch end that you will sew later.
<b> 2. </b> You have to knit eight rows so that the bottom of the doll is formed.
<b> 3. </b> Then, change the pattern to create the body of the doll and for this you need to knit one row, purl one row till you complete 62 rows.
<b> 4. </b> Next, cast off your stitches and cut the knitted piece from the ball of yarn again leaving 5 inch that you will sew later.
<b> 5. </b> Now thread your darning needle with any of the 5 inch end and sew the end in the closest side. This will later roll up the sides of the doll such that the stitching is not shown.
<b> 6. </b> Again, thread your needle with remaining 5 inch end and sew it to the closest side so that you can roll up the knitted side to form the doll.
<b> 7. </b>Once you have the knitted piece complete, you need to roll and shape it up in the form of a doll. You have to lay down the knitted piece front side down on your work surface but keep the backside facing you flat.
<b> 8. </b>Next, roll the edges tightly starting from each end so that they meet in the middle but remember to keep each rolled side even in size.
<b> 9. </b>Now, turn the knitted piece that you have rolled up over your work surface. This way, the rolled side should be facing your work surface and the other side with eight knitted rows towards you.
<b> 10. </b> Then fold the rolled knitted piece almost in half and the edge of the side you have just folded should be touching the top edge of the eight knitted rows.
<b> 11. </b>Next hold the folded knitted piece tightly with one hand and wrap elastic twice over the folded area nearly one and half inch down from the top. This will make the head of the doll and also secure the fold you made to form the body of the doll.
<b> 12. </b> Now, partially unroll the folded over knitted piece below the elastic but you need to unroll the knitted piece till you get the resemblance of the arms on either side of the body and also knitted areas stretched between them.
<b> 13. </b> Now, flip the partial unrolled portion below the elastic over the head. This will make a hood covering the head with rolled up arms near the elastic that divides and creates the neck and hands.
<b> 14. </b> You need to cut 15 inch length of sheer blue ribbon and wrap this blue ribbon round the hood from back to front in same position as the elastic. You can tie a bow in the blue ribbon with the bow in front of the doll. You can trim the end of the ribbon at a slant.
Thus, you have a knitted doll that you can gift to your kids or decorate it as a craft work piece.
Blog: of art and craft-hobbies
Website Stores
Subscribe to:
Posts (Atom)